
I've been using the A4Tech KV300H Isolation Keyboard for the past four years and for the most part, it's performed solidly. For around $30 you get a full-sized 104-key low profile chiclet style keyboard.
Recently I've acquired the need for a backlit keyboard to work when the room is dimly lit. So I had a look at what a local computer store offered. I'm one of those people that have strict requirements for things I buy, and for keyboards they are:
- Wired, because security!
- Full size 104-keys (with the three columns by two rows of editing/navigation keys above the arrows
- Full sized arrow keys (none of that half sized rubbish that Apple introduced on their Macbook keyboards)
- Low profile chiclet style keyboard with bezel around very key
With these requirements, there were only a few possible candidates and they were all gaming keyboards. Some looked fugly and others took too much desk space. The only candidate left was the Razer Deathstalker line of keyboards. It ticks all of my above-mentioned requirements and there are a few backlit variants. They have a green backlit one (Deathstalker Expert) and one with programmable RGB colours (Deathstalker Chroma). I was certainly not forking out an extra $50 for the ability to change the colours of the backlight. Green will do just fine.
So I picked up a Deathstalker Expert keyboard. One of the first things you notice about the keyboard is that it's not as premium as Razer makes it look in their renderings/photos. I then proceeded to type on the thing and the actuation pressure for the keys was a lot higher than I was used to, especially with the lighter than average actuation pressure of the A4Tech Isolation keyboard. Sliding your fingers across the keys yields a bit of a rattle like an old school keyboard (Razer's design uses hard plastic to couple the key caps to the keyboard). The keys also feels a bit mushy when pressed, with less than desired amount of tactile feedback. I decided to give the keyboard a try for a while, in the hopes that I'll get used to it. One of the first things I noticed is that I couldn't type as fast as I would on other chiclet keyboards and I would get tired much sooner than I would before. This keyboard is really not good for typing. Another really annoying issue that occurs is that they keyboard stops working after switching between console and Remote Desktop sessions a few times. I've tried the Razer drivers and Windows generic drivers, and the issue still persisted. This is and will be the first and last time I buy a Razer product.
So the search was on again, and after a Google image search for chiclet backlit keyboards, I stumble across the Moshi Luna. The Apple/OSX keys put me off initially, but it was designed for both PC and Mac and reviews for it were generally positive. And unlike many other products you find online, this was stocked locally at most Mac oriented stores. I picked mine up for $129 at Mac Centre.
Typing on the Moshi Luna is very pleasant. The keys are very quiet compared to the A4Tech Isolation Keyboard and the Razer Deathstalker. Without further ado, here are my good and bad points about this keyboard.
The Good
- Full sized low profile chiclet style keys with bezel surrounding all the keys
- Good actuation pressure with very pleasant tactile feedback (scissor-switch and membrane)
- Most keys are very quiet (with the exception of larger keys with metal bracing that give off a very slight rattle of metal against plastic)
- Key caps are removable and swappable
- A good number of backlight brightness levels (5 including off)
- Has a function lock to switch between the function keys and their alternate functions
The Bad
- Backlight escapes out the edges of the caps at shallow angles
- Apple/OSX layout and key icons (the Option/Alt and Command/Win keys are swapped compared to a standard keyboard)
- Glossy plastic makes greasy smudges and fingerprints more noticeable (especially on the clear plastic when its lit up)
- No scroll lock indicator (I use the LED for notifications)
- Then function keys default to their alternate functions each time the PC is switched on (the state of the function lock is not remembered)
- Due to the fn key and the fn lock, you lose the context menu key and the Pause/Break key.
- The palm rest acts as a light pipe and adds ambient light to a dark room
It may look like there are more bad points about this keyboard, but I'm just being nitpicky and some of the problems can be fixed. Here comes the fun of modding.
Blocking the light shone through the clear palmrest
This requires disassembling the keyboard to cover up the LEDs shinning at the palm rest. The keyboard can be disassembled by removing the 10 pieces of rubber covering up the Phillips screws underneath. Use a pin or flat head screwdriver to pry the rubber out and unscrew all the screws. The keys of the keyboard are attached to the front bezel and is connect to the circuit board via flat flex. Disconnect these to avoid damage. There is also an ESD wire screwed into the metal behind the keys.

The Moshi logo on the top left of the keyboard is lit by the light diffuser on the main PCB. If you dislike the logo, it can be covered up.
The palm rest itself can be unscrewed and removed, but you will be left with a gap where the palm rest protrudes from the keyboard.
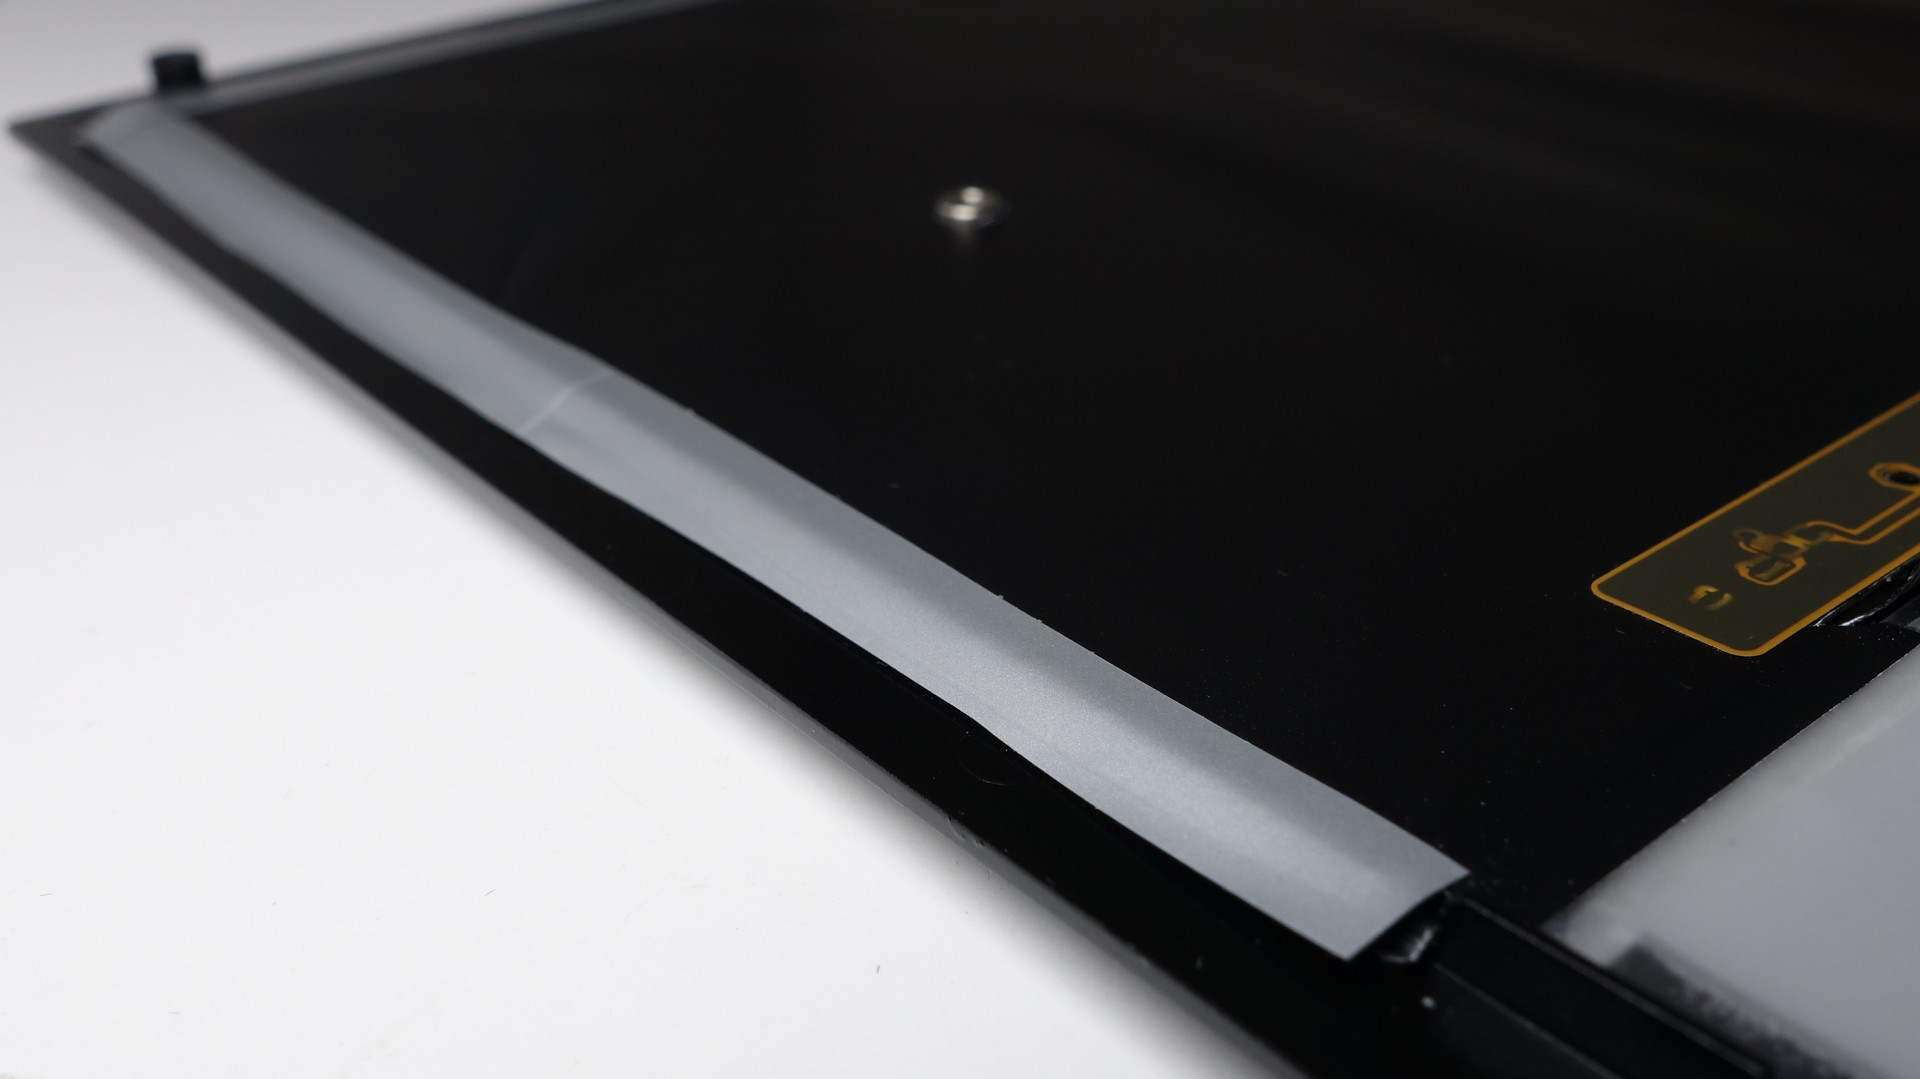
To block the light coming out of the edges of the palm rest, simply add some opaque tape to the edge between the front bezel and the metal back plate.
Prevent the Backlight Escaping the gaps
When sitting at a comfortable/ergonomic distance from the keyboard, the backlight can be seen through the gaps between the key caps and the keyboard. The bottom of the function and number rows as well as the left side of the number pad are especially noticeable.

The solution is to remove the key caps and the key retaining clip to cover up some of the light diffuser.
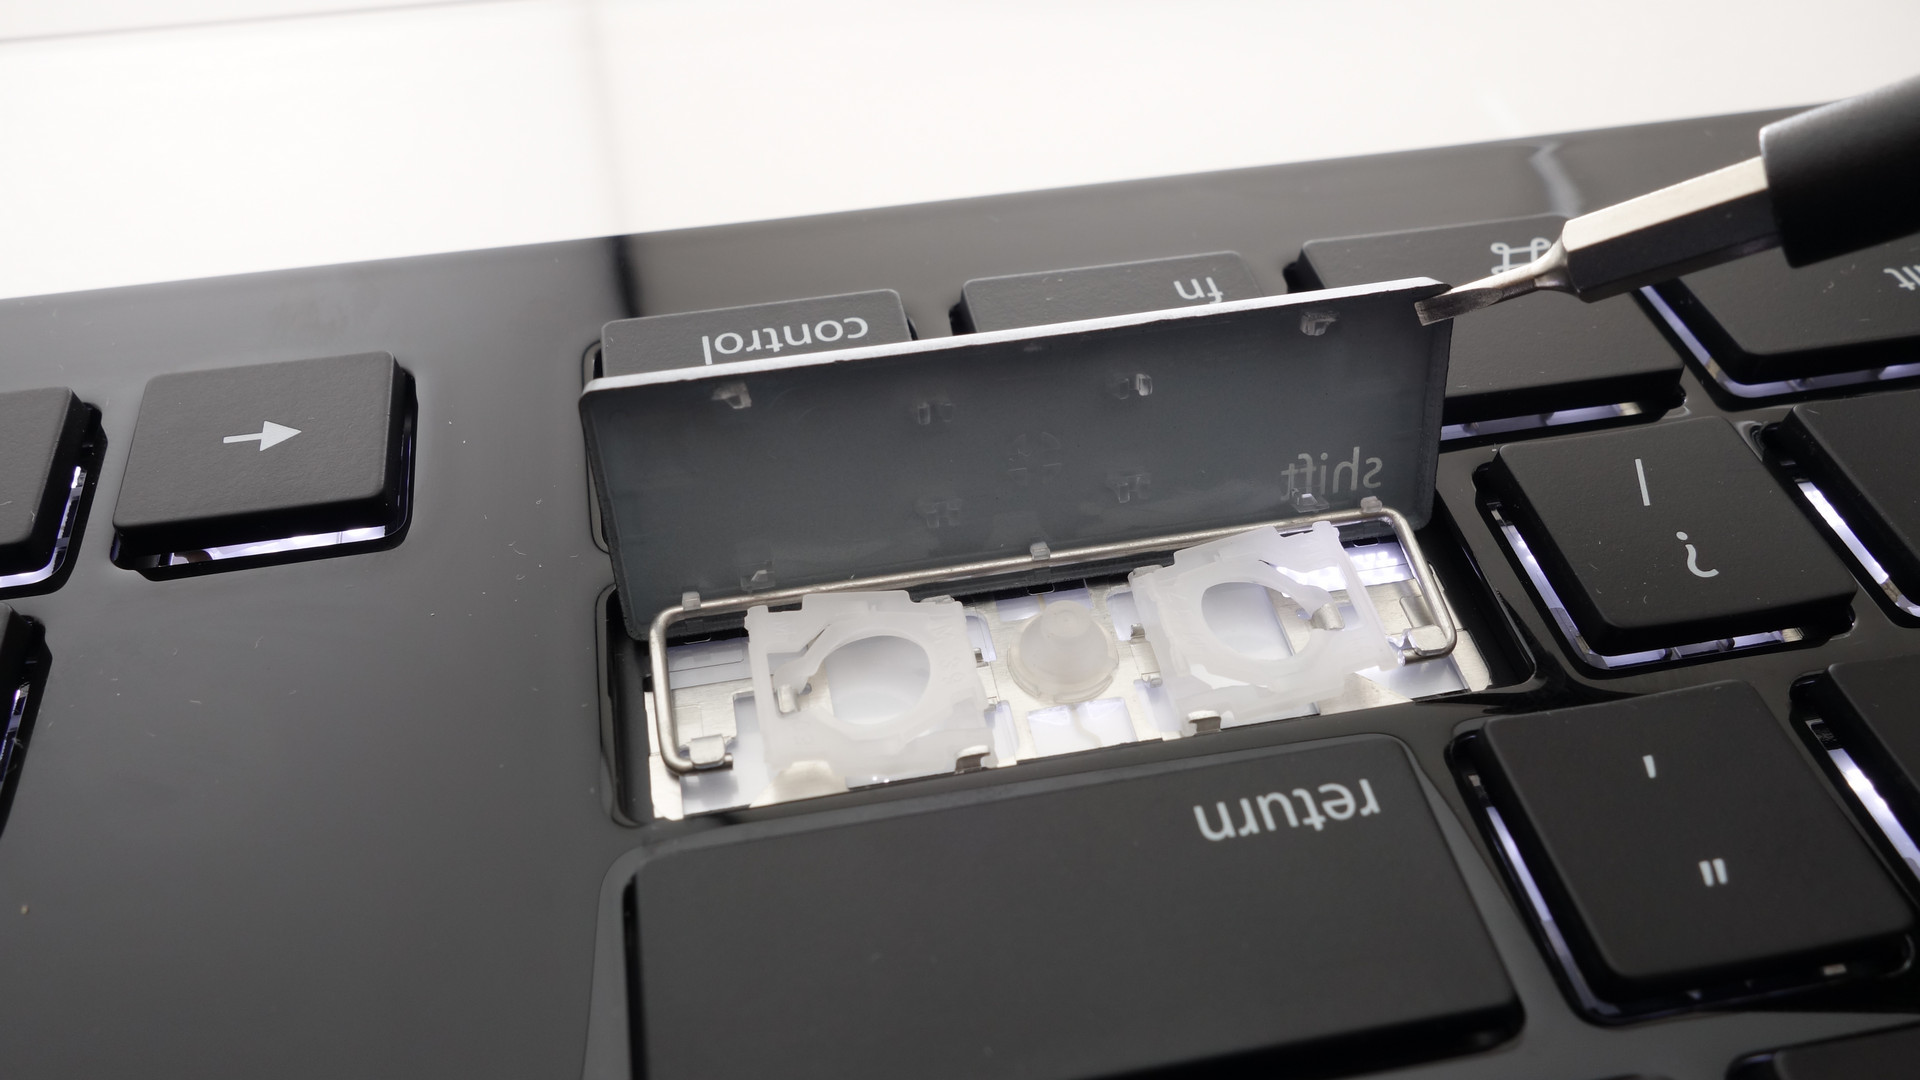
All the key caps are removable. The key caps are attached to the keyboard by a scissor-switch retaining clip. The retaining clip is attached to the key cap with a hook and clip structure. On one side the hook it slid in and on the other side the clip snaps into place like a peg.

All the keys the size of and smaller than the Tab key have a single retaining clip. Some of the retaining clips are mounted sideways. Regardless, all these key caps can be peeled off from the top right corner.

Keys larger than the Tab key have two retaining clips and metal bracing. These keys may require you to slide something flat into the gap to detach the retaining clip.
After removing the scissor-switch retaining clip, the edges of the light diffuser can be coloured in to reduce the amount of light bouncing out the gaps. The ink used in Sharpie permanent markers will give off purple light. Artline permanent markers weren't dark enough and let too much light pass through. In the end, I pulled the tip off a black Uni-ball Eye pen and used its pigment ink.
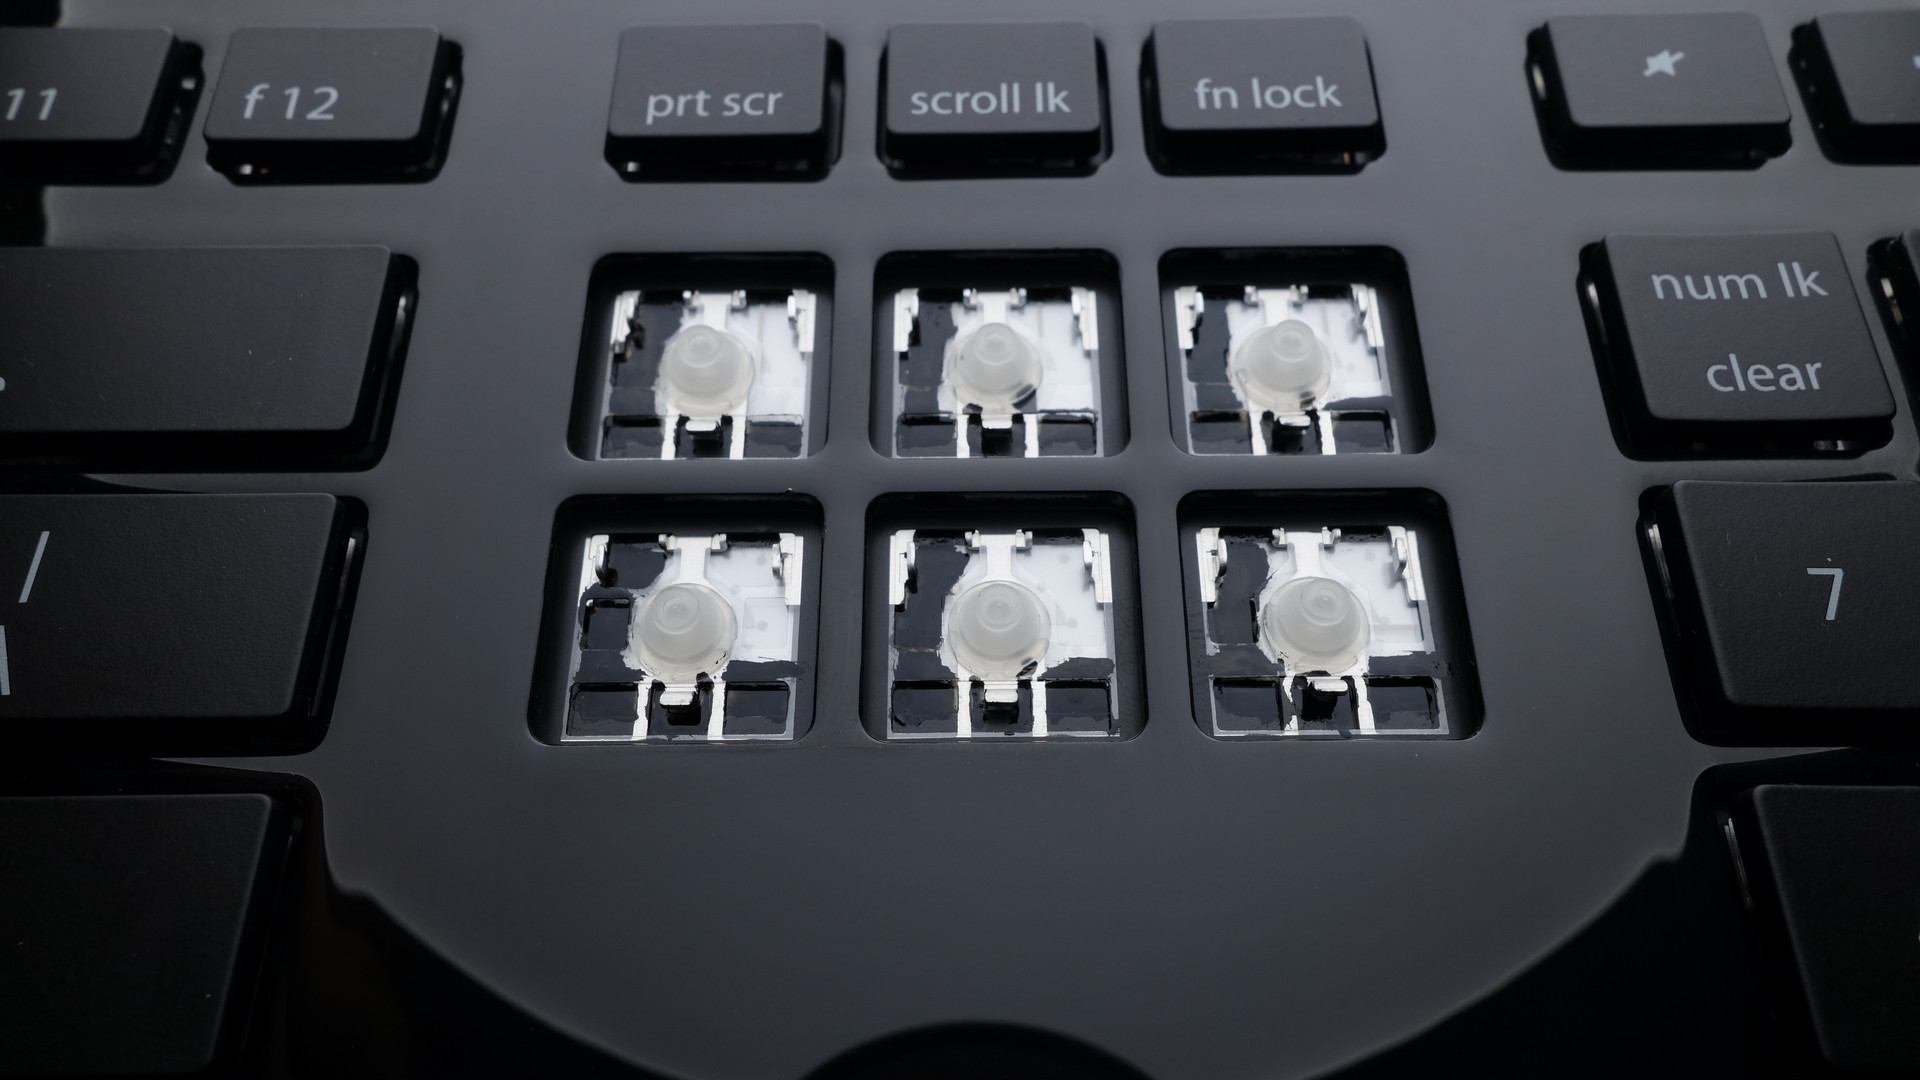
I covered only the edges of the key that are in line of sight with my eyes. Remember not to cover the entire diffuser as that would defeat the purpose of a backlit keyboard. 108 keys later, there is significantly less light shinning out of the gaps. The following photo was taken with HDR 6EV to match what a human eye sees.

Swapping the Option/Alt and Command/Win keys
A standard keyboard's modifier keys are in the order Ctrl Win Alt while the Apple/OSX layout results in Ctrl Alt Win. Luckily, the Win and Alt keys are the same size and we can simply swap the keys around.
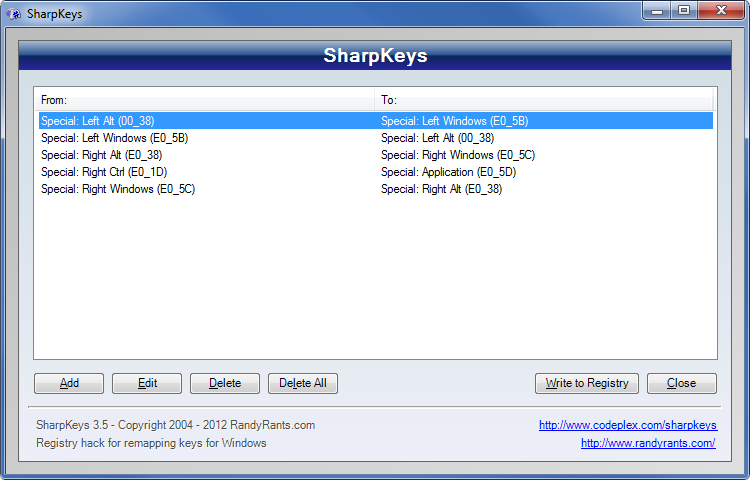
We also need to remap the keys as the original scancodes are still being sent.
Windows offers a registry value dedicated to remapping scancodes at HKEY_LOCAL_MACHINE\SYSTEM\CurrentControlSet\Control\Keyboard Layout\Scancode Map, but thankfully RandyRants has created a GUI tool called SharpKeys to make life easier. Simply map the keys to each other. I have also mapped the right Ctrl to the Application/Context Menu key.
Linux users can remap with udev(8), setkeycodes(8) or through a window manager such as X using xmodmap(1). Refer to this Arch Wiki.