
The DER (Digital Education Revolution) lasted 5 years starting in 2009, with the last generation of laptops handed out in 2013.
The first two models were pretty rubbish laptops. They had tiny screens and the S10e had unacceptably small keys. All models except the X131e had an SSD, and the DET SOE image was horrendously slow. They had a plethora amount of software installed and they didn't make much of an effort to prevent useless services and startup entries. The login process was unbearable... at least for me (I've been made impatient thanks to SSDs).
| Year | Model | Machine Type | Storage |
|---|---|---|---|
| 2009 | IdeaPad S10e | 4333 | 160GB HDD |
| 2010 | ThinkPad Mini 10 | 3507 | 160GB HDD |
| 2011 | ThinkPad Edge 11 | 0328 | 160GB HDD |
| 2012 | ThinkPad X130e | 2338 | 320GB HDD |
| 2013 | ThinkPad X131e | 3367 | 120GB SSD |
The laptops have a BIOS supervisor password and was locked until the owner of the laptop finished year 12 or the school uses it as a T4L device. The BIOS was configured to boot from the internal HDD only. When a student finishes year 12, the laptops are It's the school's decision who gets to keep the laptop after year 12, but most schools allowed students to keep the laptops unless they didn't want it. When a student is graduating, a new entry should show up in SCCM to Unlock the BIOS and image the laptop to a clean install of Windows 7.
The DET have recently been decommissioning DER related servers/services and lately there have been problems with the SCCM. There have been imaging DER laptops and joining the DETNSW domain. Seeing as this year's year 12 have last generation of DER laptops and the DER program is pretty much non-existent, I would show the procedure to unlock the BIOS, for any people who still have a locked BIOS and have physical access to the internals of the laptop.
For all the IT people who work with these DER laptops, you can actually obtain the BIOS unlock binaries from the SCCM after starting the DER Grad Unlock. The SCCM will create some folders in the system drive while it performs the unlock. You can suspend the SCCM process using Sysinternals Process Explorer after it starts and downloads the required files. You can then spend all the time you need to obtain the required permissions to access the files and make a copy. If you want a copy of the files, shoot me an email to my det nsw email account. You can find me on SMU by searching for my last name (the entry that has a Business Telephone No. ending in 1).
I have already written an article explaining how to bypass the supervisor password if are able to disassemble the laptop. In this post, I will provide a guide to disassembling the last three generations of DER laptops and removing the supervisor password.
The above-mentioned article is available here.
Required Tools
- Torx T6 screwdriver
- Philips #1 screwdriver
Recommended Tools
- USB keyboard
- Spudger or fingernails
Lenovo Edge 11 (0328)
Disassembly
- Remove the back cover by unscrewing the three torx screws
- Remove the battery pack and then remove the two large flat Phillips screws holing the keyboard.
- Remove the HDD by removing the two M2x7 screws and sliding it out
- Remove the keyboard by pushing it up and out though the HDD bay. The keyboard is attached by two flat flex cables. The larger connector can be unlocked by sliding the black ends of the connector towards the trackpad. The smaller connector has a locking lever which can be pried up with a fingernail or tweezers.
- Disconnect the two flat flex cables from the mainboard in a similar manner to the smaller connector on the keyboard. One is for the trackpad and one for the power switch).
- Disconnect the microphone from the mainboard by sliding the black part of the connector towards the right. (The connector is located under the bottom left corner of the keyboard.
- Remove the three M2x7 screws exposed after removing the keyboard
- Remove the part of the chassis which consists of the palm rest, trackpad and power button by using a spudger or running fingernails between the main chassis and the palm rest. This part is held together with small plastic hooks running around the chassis. Apply a little force to unhook them.
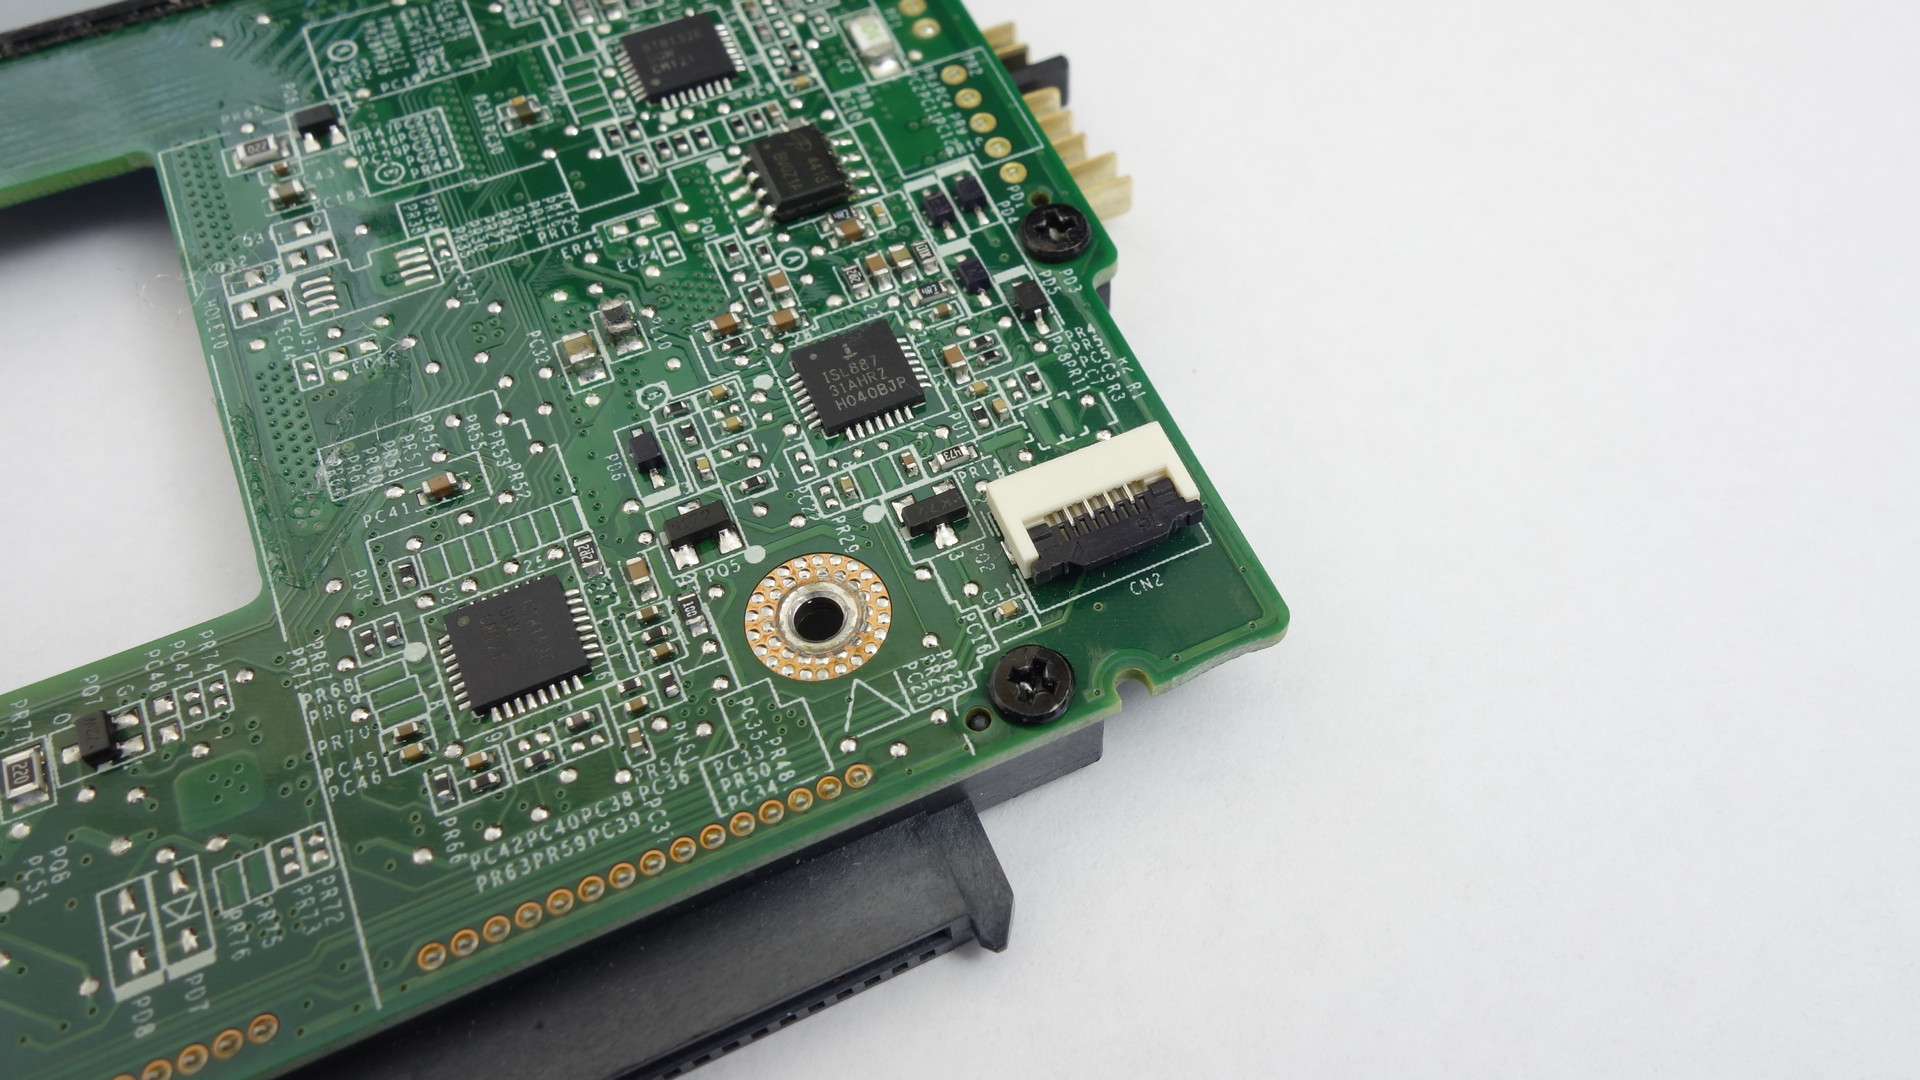
Locating the EEPROM Chip
The EEPROM chip is located to the right of the speaker connector. It should be a chip labelled L08 but could labelled PS08A or be a different chip.

Other Information
The Edge 11 runs a Legacy BIOS. Follow the procedure for BIOS based systems.
The SDA and SCL pins are the two above the number 8 of the label (the opposite corner of the dot/circle marker).
As the power button is located on the part of the chassis which is removed, you will lose the functionality of the power button. You can still simulate a press of the button by shorting the pins that lead to the power button. The pins for the power button are the first two pins (from the left) of connector CN2.
Be extremely careful when shorting these pins. Shorting pins other than the first two will result in you damaging the power management chip and your device will have problems powering off!
Lenovo X130e (2338) and X131e (3367)
Disassembly
- Remove the back cover by unscrewing the three torx screws
- Remove the HDD/SSD by removing the two M2x7 screws and sliding it out
- Remove four M2x8 screws holding chassis and keyboard
- Remove the two M2.5x5 screws to the left and right of the battery pack
- Slide entire keyboard up towards the battery and then lift up from the bottom
- Disconnect the two flat flex cables (for the keyboard and TrackPoint) from their connectors by levering the front part of the connector up.
- Disconnect the flat flex cables from the mainboard in a similar manner to the ones on the keyboard.
- Disconnect the microphone by sliding the connector towards the right
- Remove the three M2x5 screws exposed after removing the keyboard
- Remove the part of the chassis which consists of the palm rest and trackpad by using a spudger or running fingernails between the main chassis and the palm rest. This part is held together with small plastic hooks running around the chassis. Apply a little force to unhook them.
- Remove the piece of black plastic around the microphone connector (to the right of the USB ports on the left hand side) as the EEPROM is located underneath.
Locating the EEPROM Chip
The EEPROM chip is located just below the microphone connector. I have seen two chips used for the EEPROM. It should be a chip labelled L08 or PS08A but could be a different chip.
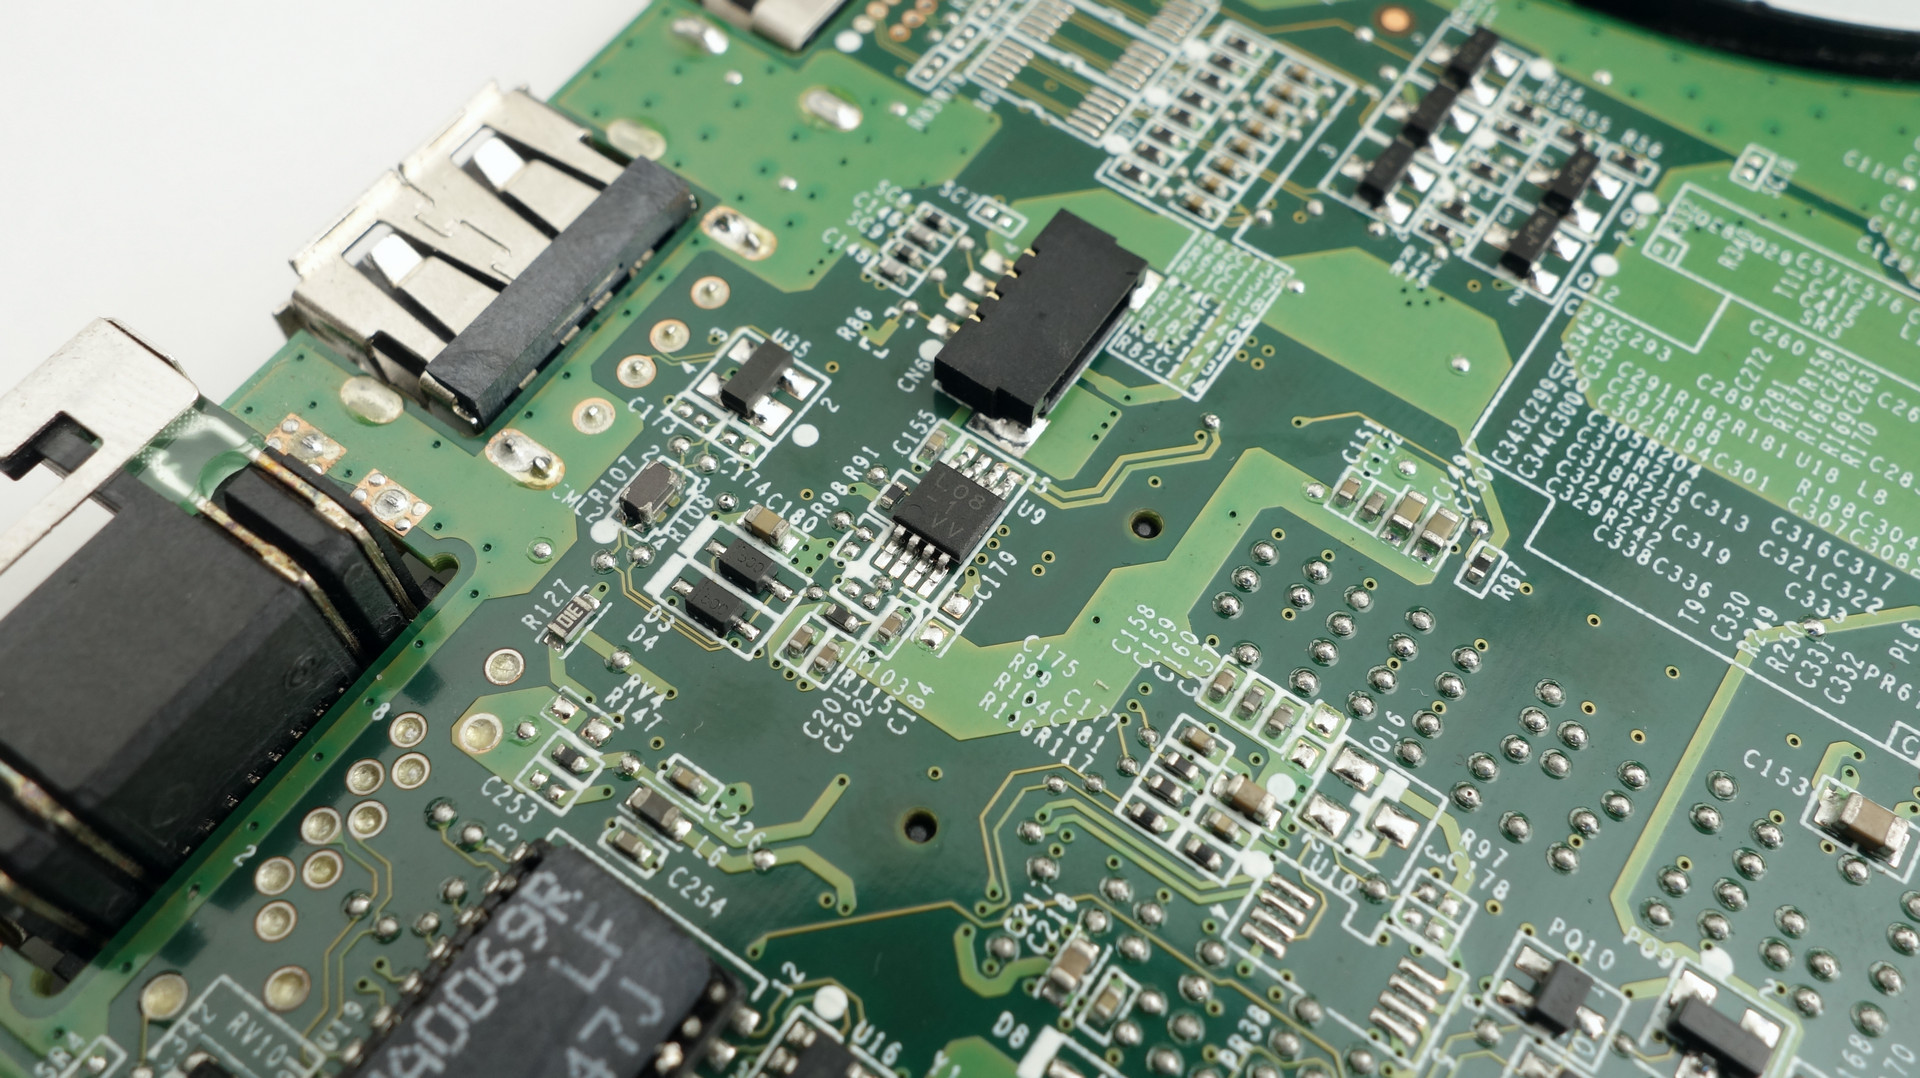
Other Information
The X130e and X131e run UEFI. Follow the procedure for UEFI based systems.
The SDA and SCL pins are the two above the number 8 of the L08 label or the 8A of the PS08A label (the opposite corner of the dot/circle marker).